
Splints: The good the bad and the ugly
Building a good splint takes time and thought. In our wilderness first aid courses some students do lots of both and still the end result leaves something to be desired. This post discusses improvised splints and gives some tips to building your own. Over the last 6 years teaching Wilderness First Aid, I’ve seen it all. I have also made some useful splints in my 10 years guiding commercial wideness raft trips.
What makes a good splint

A good splint satisfies three main criteria:
- It is comfortable. That is to say that it fits well, and feels good to the patient.
- It is functional. A good splint should provide that stability and support, while immobilizing the affected area.
- It should look good. Style points for splints that look good and stay looking good during an evacuation. this means that they don’t fall apart or come undone overtime.
Get wise and improvise
Improvisation is one of the key components to being good first responder in the wilderness setting. The bottom line is that we don’t have all the gear we wished that we did when a situation arises. The ability to assess and address with what is available to you in the backcountry is a skill that can be taught, but is more likely honed over time spent in the field. “RGI” or River Guide Ingenuity as guides like to call it takes creativity and critical thinking. Find a way to make it work.
Here are a few improvised uses of common place items on a boating or backpacking trip for splinting.
- Raincoat / jacket
- Crazy creek chair
- ski /trekking / tent pole
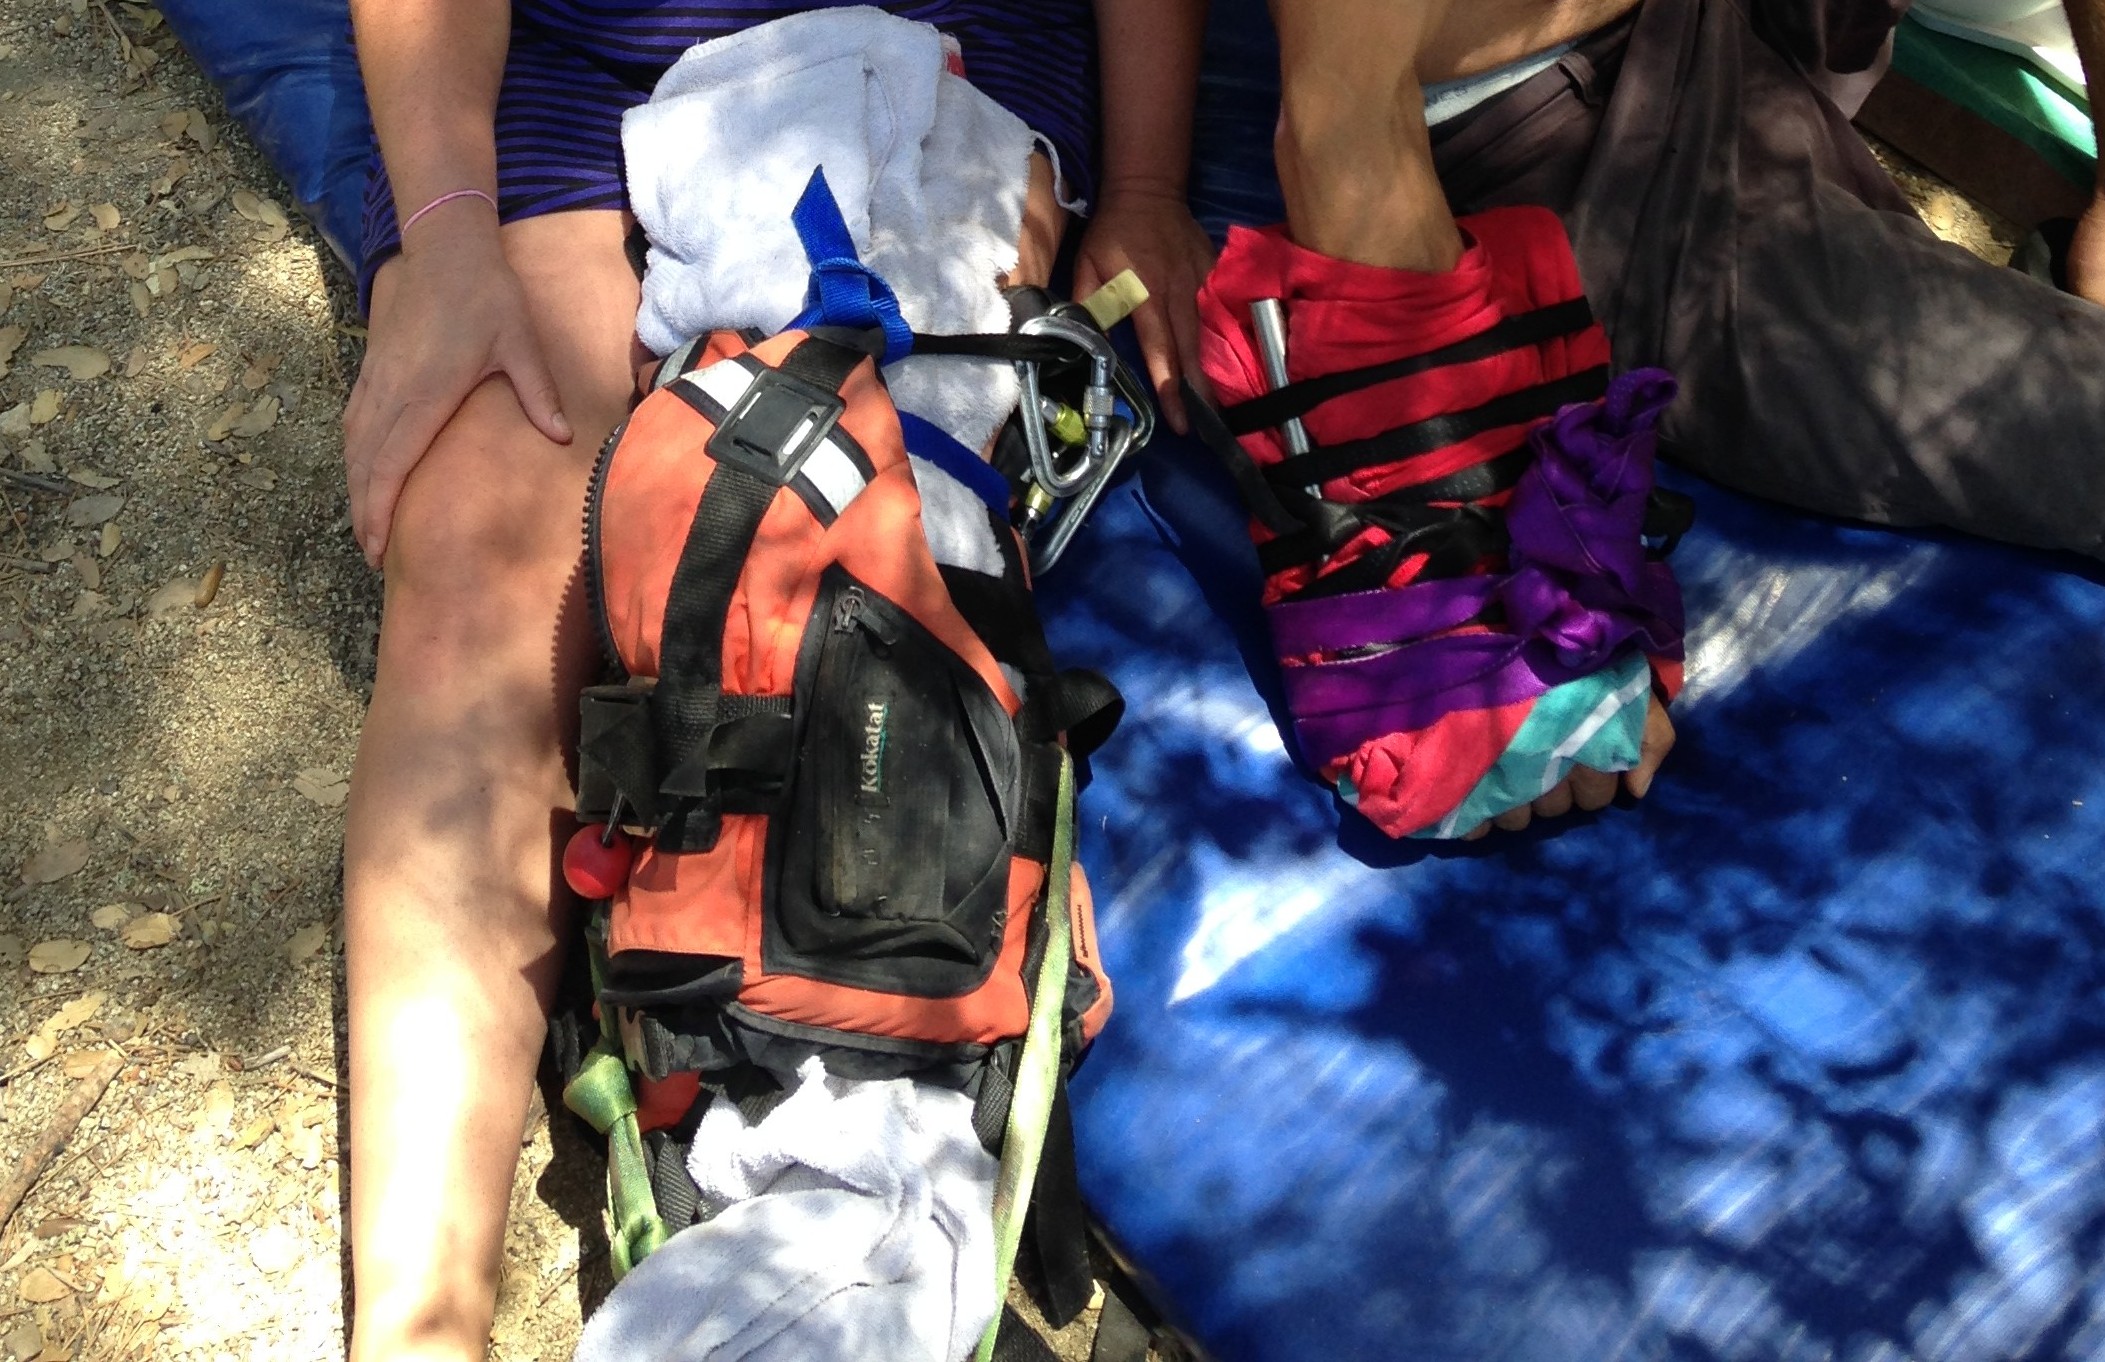
- lifejacket pfd
- t-shirt / sweat shirt
- paddle
- Backpack / belt pack
Splint Style and Construction
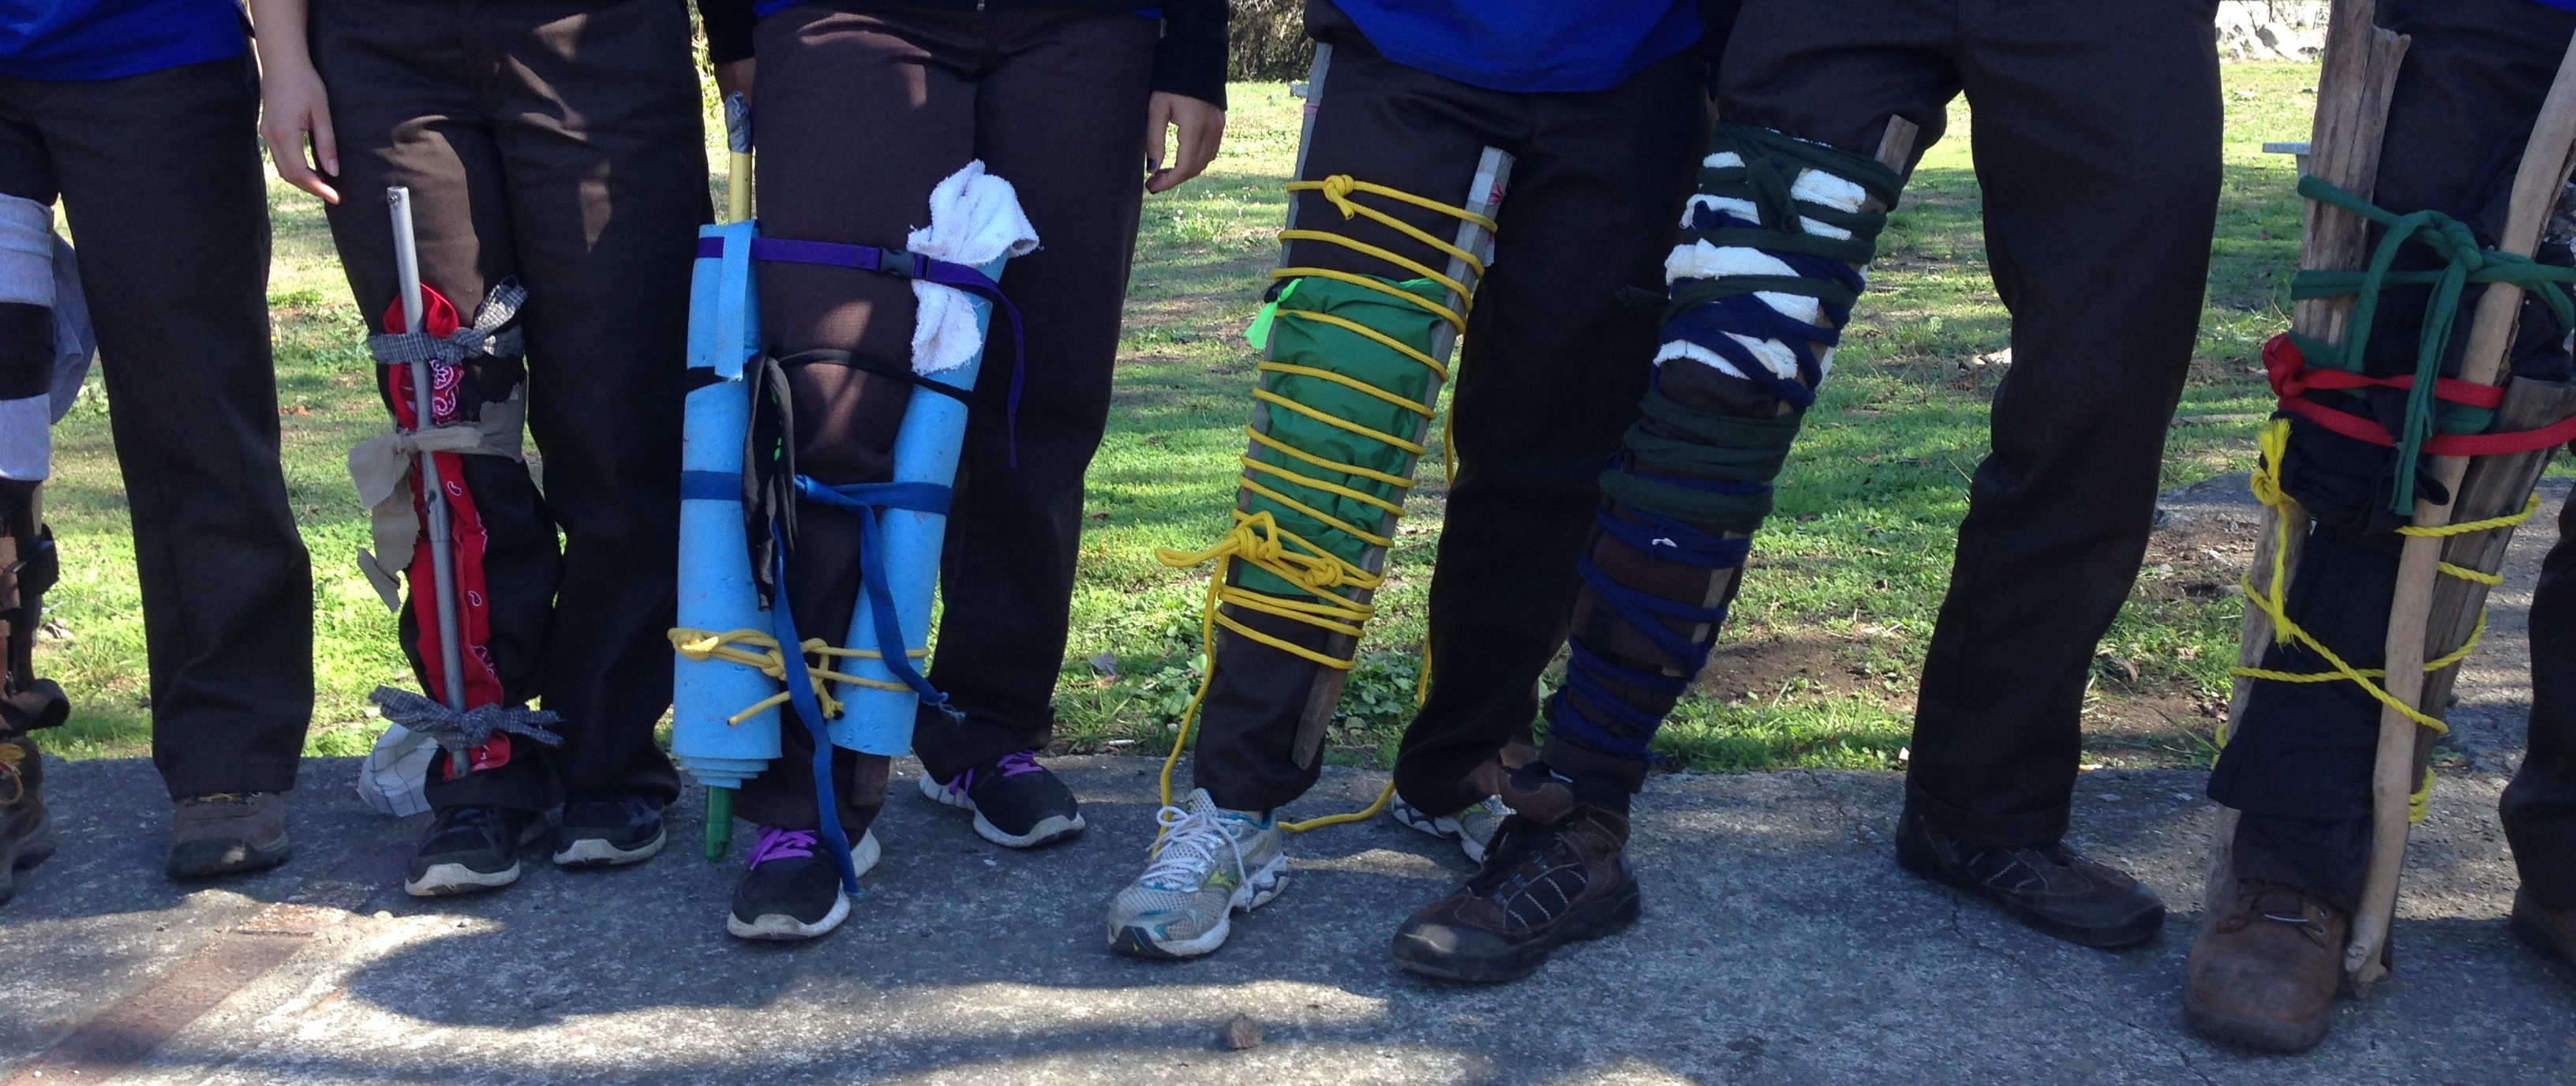 From a materials standpoint, a splint has three parts: padding, rigidity, and something to hold it together / cover it up. The classic “sandwich” style splint utilizes these three layers in the above mentioned order to immobilize an injured area. The bigger the bone you are trying to immobilize the more holding power you’ll need. Security is a huge deal. Sure NRS straps work great because you can tension them and adjust them, but we don’t always have them, so be prepared to use string, rope, shoe laces t-shirt strips to secure the splints you build.
If a pad thermal rest or float bag is available you can try the “jelly roll’ splint. This style you roll up bulky padding and tension it (often with a rigid component inside) around the affected area.
Splint Tips: a few reminders.
- Check circulation sensation and mobility before and after you build splint. Continue to monitor CSMs.
- Immobilize the bone above and below a joint injury and the joint above and below a bone injury.
- For leg immobilization the rigid components should be as long as they can without interfering with walking. (for example: hip to toe on the outside)
Want Hands-On Wilderness Medicine Training?
Our Wilderness First Aid courses teach these exact skills in the field, with CPR included. Small classes, expert instructors.