Author Archives: Abigail Polsby

Myths and Truths about Throw Bags and Throw Bagging

Precision throw bagging

Precision throw bagging

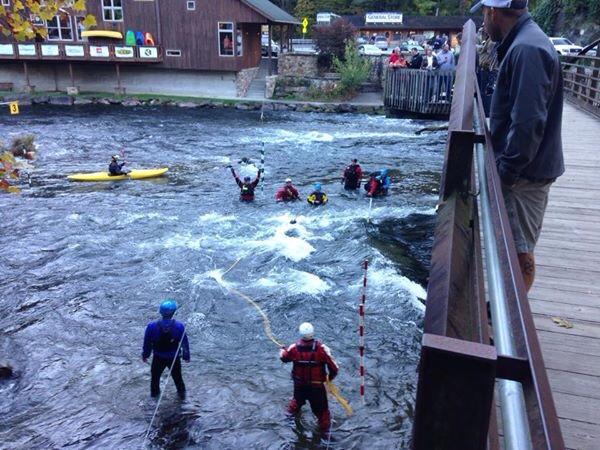
Anyone who has any training at all in Swiftwater Rescue, River Rescue, Flood Rescue,or Surface Water Rescue knows something about throw bags and throw bagging.  When we are challenged into trying to reach someone who needs rescue from the water, if we can not make hands on contact with that person, than often times our option is to throw a rope.  Every rescuer, river guide, whitewater raft, or motorized boat operating in any kind of moving water generally carries a throw bag.  And yet, the effectiveness of this tool takes a great deal of forethought and competency to be helpful at all.  As a matter of fact, throw bags can make a rescue situation WORSE, by adding a hazard into the rescue, or destabilizing the victim.   Here are some myths and facts about throw bags and throw bagging:

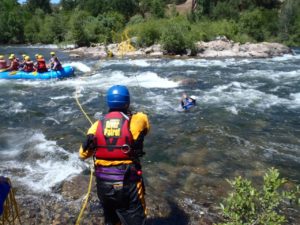
1.  MYTH: In the low to high risk model that many rescuers use of:  Reach, Throw, Row, Go, Tow,  Helo, THROW is listed before ROW, or GO as a lower risk option.  These options can only be “risk” related by understanding the actual resources at a rescue scene.  It is certainly much safer for a skilled boat captain to position their boat in a way to simply assist someone back into the boat, than to rely on a rope to be thrown  from shore accurately, and for the victim to be able to hold onto the rope, and get safely to shore.  If the boat, or a simple wading assist can be used, this is much more effective, and I would argue, safe, than actually relying on throw bags or throw bagging.  FACT:  Using a boat, or wading may actually be a safer and more effective way to rescue a victim than using throw bags and throw bagging.

throw bag photo

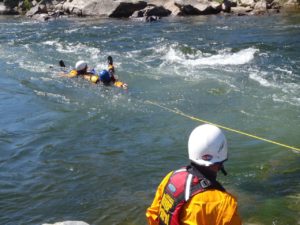
2.  MYTH:  A rope is a safe way to rescue someone from the water.  FACT: ” The rope, once it is IN the water, is an evil serpent looking to do nothing but harm.” Mike Mather quote.  There is much debate about whether or not to put a knot on the standing end of a throw bag rope.  The proponents of a clean rope argue that the rope is less likely to snag in the water with a clean end.  The loop proponents argue that it gives a way to know you are at the end of the rope, and also gives a loop to quickly attach a carabiner.  It is important that we do not forget the MOST important issue here:  NOT TO LET GO OF THE ROPE!  There is not a rescue instructor who does not have a story about someone who either drowned entangled in an escaped throw bag, a boat trapped by such a rope, or a prop disabled.  Any rope that is in the water is an extreme hazard to victims and rescuers alike.  The throw bag is safe only when the rope remains stuffed ALL the way in the bag, and the bag and rope stay contained with the rescuer.

3.  MYTH:  It is a good idea to throw a rope from a boat.  FACT:  While it MAY work in the perfect circumstances, generally the rope inhibits the ability of the driver to drive the boat, and forces the boat and its passengers to negotiate around up to 75 feet of loose rope in the boat.  If there are paddlers, or oars, the rope can become entangled around paddles, oars, feet, arms, and create quite a web.

throw bag 2

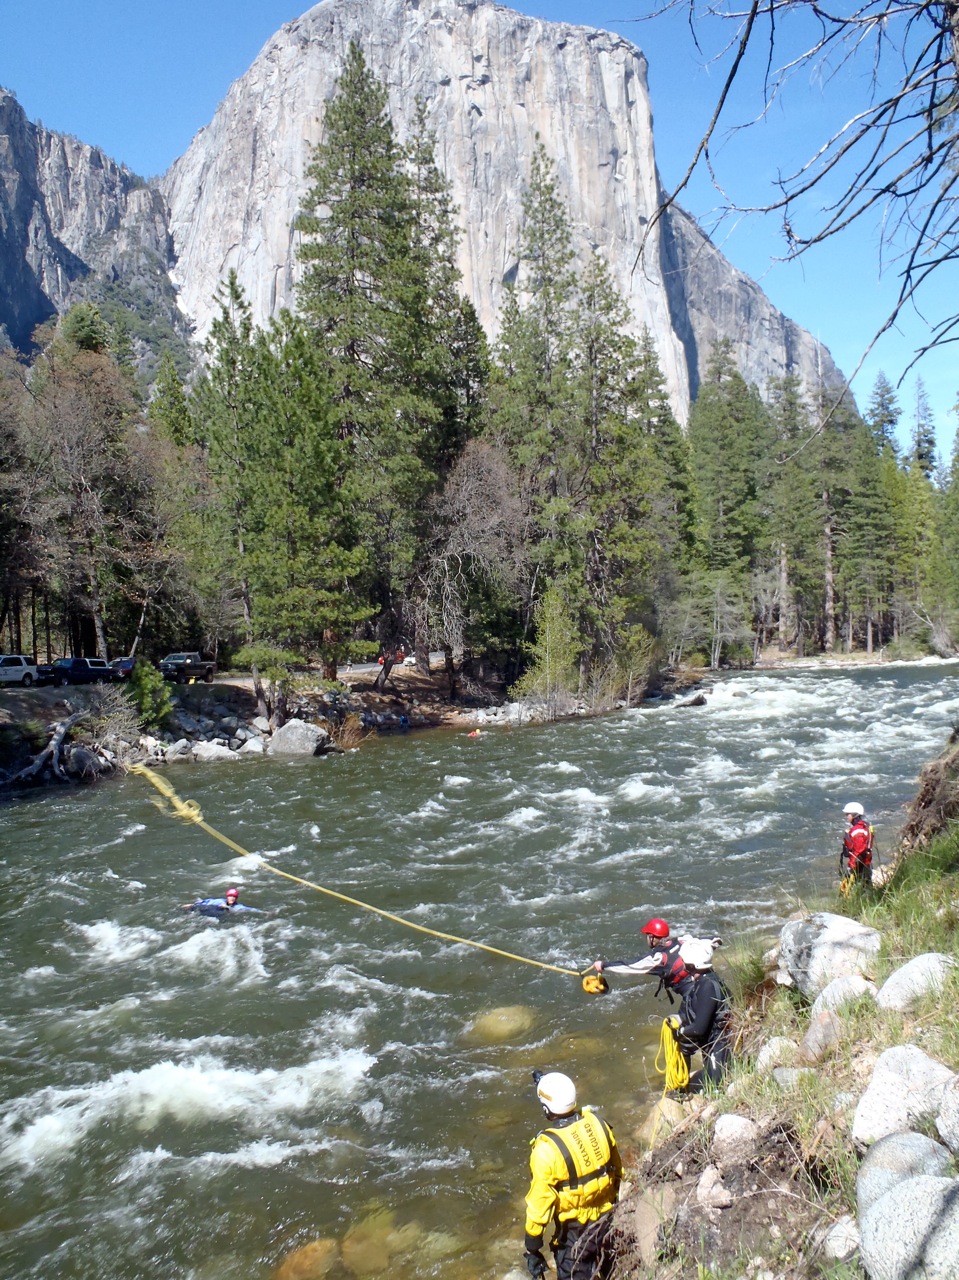
4.   MYTH:  The most important thing is getting the rope TO the victim.  FACT:  The most important thing about throw bags, and throw bagging, is having the skills to not only get the rope TO the victim, but also have a strategy for getting the victim (and, or rescuer) to shore.  Getting a victim to shore is like “landing a fish”.  You have to take great care to not pull the rope out of the victim’s hands and gently use a dynamic belay, or dynamic movement to make it as EASY as possible for the victim to hold onto the rope.  If a victim’s head goes under water because of too aggressive of a pull, they are likely to let go of the rope.  Because a rope inhibits any ability to self rescue, the throw bagger must take great care to be sure to be able to “land the victim” before the rope is even thrown, and that there is a safe eddy to pendulum the victim into.

These are just a few of the many Myths and Facts about Throw Bags and Throw Bagging.  All comments are welcomed!  Have a great day!

Swiftwater and Flood Rescue Training for El Nino


OLYMPUS DIGITAL CAMERA

BORSTAR Commanders training together with RDC, River Boards, and Rafts

As we head into the potential of an El Nino year, our Sierra Rescue classes are filling up with Lifeguards, Fire Fighters, and many Government employees being sure they are as prepared as possible for the hazards that an El Nino year may bring with it.  Our Swiftwater and Flood Rescue courses teach such skills as self rescue, hazard assessment, flood search and rescue, vehicle rescue from floods, and other useful skills to review for the rescuers involved.  With the current low flows, it takes creativity to help rescuers prepare for floods and rivers that soon may not be safely accessible for the rescuers at all.

OLYMPUS DIGITAL CAMERA

Self Rescue practice in Swiftwater Rescue Training

Besides Swiftwater and Flood Rescue Advanced training, Surface Water Rescue is an important component to being ready for more water in the West.  Lakes, ponds, and inland waterways become inundated with water, and knowing how to safely use adjuncts, effective search techniques, and having exposure to the rescue tools available can great increase the “tool box” for the rescuer.

DSCN5014

Surface Water Rescue Training with a rescue board

CPR, First Aid, and even Wilderness First Aid skills become essential for assisting once the rescue is complete.  The more members of the public that are trained to recognize the hazards associated with immersion, submersion, and hypothermia, the more help there will be, and the better chance that more people will  be able to prevent further complications once someone is safely on shore.

IMG_4020

CPR, First Aid and Wilderness First Aid training along the banks of a river in winter.

Due to the PET ACT passed by Congress after Hurricane Katrina, more technical animal rescue training has become available for rescuers. Floods and high water years can cause sink holes in some areas of the Country, and a higher exposure for horses, cattle, and other large animals to get stuck in the mud.  Great tools are now available to help with relieving suction as well as getting a wide harness around an animal.  Also, due to the PET Act, rescuers are much better prepared to bring along all the family pets.

Technical Large Animal Rescue training in the mud.

Technical Large Animal Rescue training in the mud.

Motorized boats become a great tool for accessing folks  after the initial phase of flooding is over, and the speed of the water settles into a safely navigable waterway.  There are many Flood Rescue Boat Operators that are updating their skills, and preparing their boats for quick deployment.

OLYMPUS DIGITAL CAMERA

Flood Rescue Boat Operator Training for Reno Fire

OLYMPUS DIGITAL CAMERAOLYMPUS DIGITAL CAMERA

We were lucky enough to have Reno Fire participate in a Flood Rescue Boat Operator course in Donner Lake last week.  Although there is currently  not enough Swiftwater for a Swiftwater Boat Operator Course; we were able to do some pick-ups and create flood like conditions in some smaller channels on the East Side of the Lake.  The Reno Fire WET team is one of the best trained Fire Department Swiftwater teams, and it is their dedication to training, and the competency of its members that set them apart.  We have been fortunate enough to be part of their Swiftwater Rescue Technician, Swifwater Rescue Technician Advanced, Rescue Swimmer Basic, Rescue Swimmer Advanced, Water Instructor Course; and now the FRBO course.  As always, we appreciate their enthusiasm.  Thanks for a great week from Don, Julie and Randy!  We hope to see them in our SUP Rescue course before next summer begins.

Sierra Rescue Travelogue : Patagonia and the Futaleufu

Scouting Terminator

Scouting Terminator

Sierra Rescue co-owner Julie Munger spent a large portion of her international professional guiding career in Chile guiding on the BioBio and Futaleufu Rivers.  Lead instructor Zach Byars recently visited the area on a trip in February, and shares a few photos below.

I recently had the opportunity to travel to Chile and got to spend a few weeks on the Futaleufu river in Patagonia. My wife and I joined up with a commercial trip through BioBio expeditions. We bridged the gap between guests and guides, leaning more toward the guide side. Once we proved our worth with on-water skills, Tessa and I had free rein to tag along in any craft we wanted. The “puente puente” section, just a few miles downstream from Bio Bio’s camp, provided a perfect playground for whitewater thrills. Highlights included an R2 run and a double ducky descent on the famous 8 miles Class IV bridge to bridge day run.

The Futaleufu runs through a pristine section of Patagonian wilderness. Nestled between glaciated mountain peaks the water is an unbelievable color and its current holds a power rivaled by few rivers in the world. Picture the volume of the grand canyon flowing downhill with 10 times the gradient, with similar style to the Illinois or Touloume rivers.

futa

Rowing a safety cataraft down the bridge to bridge

Traveling to the Futaleufu river was an incredible experience highlighted by great people and guided by some of the world’s best whitewater professionals. Combined  with the stunning rugged beauty, and first class trout fishing, I’m not sure how I ever left. Next season we’re looking to combine forces with Bio Bio for a swiftwater rescue training on the Futaleufu and an International Rafting Federation guide assessment. Stay tuned for more information.

Wilderness First Responder

tree house collapseThis spring we have been busy with our wilderness first responder courses. Beginning this past January we have taught 6 full first responders  and 4 WFR re-certs. Most recently we hosted a Wilderness First Responder in Coloma, Ca. Consistent with most of our wilderness medicine classes, the WFR was a fast paced, hands-on action-packed 10-day study of back country medicine.


IMG_8638

Students hailed from a variety of California locales with a few joining from out of state. As an instructor it is really rewarding to watch the training unfold and to see the students’ progression. We strive to make the scenarios realistic and relevant to the places that the students spend time. In this past class we had a burning man collapse, an avalanche multi- victim burial, and an icefall incident, to name a few. Navigating the patient assessment system, and jumping into responder mode isn’t necessarily an easy transition, but with time and practice, theses guys made good progress.


Another highlight of the WFR is the night search operation. Usually this drill takes a few hours and lets students navigate the difficulties of working at night. Bottom line is that communication and lighting are huge impediments to working at night. hazards are heightened, and even simple things become difficult.  If you spend time working or recreating in the wilderness, the WFR certification is for you. It has become  the gold standard industry-wide. Come train and practice your backcountry first aid skills, sharpen your patient assessment technique, and and hone to stabilize and improvise. We’ve got several courses coming up this spring and several more this fall. Check out our website, www.sierrarescue.com, for schedule and upcoming courses.

Hypothermia: kicking the cold

Weather and water can be unpredictable, and often paddlers are caught off-guard by an unexpected storm or an unplanned swim.  With cold related problems, good prevention is key, and understanding how to manage hypothermia is an important skill for guides and paddlers alike. Different texts define the stages of hypothermia in slightly different ways, the discussion below focuses on the signs that may be visible in your guests and paddling partners.

thermal protection to prevent further heat loss

thermal protection to prevent further heat loss

Keep in mind the 4 ways that a body can loose heat:

  • Radiation – we “emit’ heat much like the sun gives off heat
  • Convection – heat loss is 25x greater when submersion in water.
  • Evaporation – moisture interacting with air and thus reducing body temperature (sweating or splashes on the skin)
  • Conduction – contact will transfer heat until the temperatures reach equilibrium

In the early stages of hypothermia the patient is awake and visibly cold; their body is burning any available ‘fuel’ and is taking steps to stay warm.  Remember that shivering is a way for the body to try and create heat.

The “umbles”  As heat loss eclipses heat production, the body starts to prioritize blood flow to the core of the body and decreases circulation to the extremities resulting in loss of fine motor skills (dexterity) and speech. We call the resulting signs the umbles; mumbling, stumbling, bumbling and fumbling.

Hypothermia is life threatening, and if a person continues to loose heat, the core temperature will to drop as hypothermia progresses into later stages. Shivering will become violent and uncontrollable before it eventually stops. As the body’s last-ditch effort to warm itself is exhausted more pronounced changes in the level of consciousness are visible.

If your patient is awake, get the person up and moving to increase metabolic output. Give this person fluids and feed him/her, starting with simple carbs and then progress to more complex foods.  The best way to start warming someone up is from the inside out, starting his or her internal engine. Prevent further heat loss by removing any wet clothes and replacing them with dry insulating layers. Don’t forget that even a small thin wet layer can continue to suck heat out of the patient. Use of a hypo-wrap with vapor barriers and waterproof materials can help keep heat in, and radiant heat sources can be added such as warm water bottles or rocks.

Lastly, here are a few hypothermia tips for commercial raft guides

  • If you are cold as the guide, your guests are freezing. Remember they get the brunt of the water and splash and are cold.
  • Keep guests hydrated and fed even on warmer trips to keep those fuel sources stocked.
  • Assess your crew and identify poor layering choices like cotton before hitting the water.
  • Look for the signs and catch it early.

Hypothermia can strike anywhere anytime, and given the temperature of the water that people flock to for recreation, it always a potential problem. Have the right gear, and be aware of problems before they arise.

Boater safety. Know before you go.

Rainey Falls scoutBoat safe. Be prepared.

One of the mainstays when approaching any rescue centers on the “K.I.S.S” theory: Keep it simple and safe. As rescue efforts unfold adhering to this simple acronym can help keep rescuers and bystanders safe. Another widely accepted phrase in the industry is that, “the best rescue is one that never happens.”  For whitewater enthusiasts, whether you are multi-day boater or a weekend warrior paddling day trips, diligent forethought can prepare you when things go wrong, and in some cases can prevent the accident from ever happening in the first place.

 Know before you go.

They say that “prior proper planning prevents piss-poor performance,” and Benjamin Franklin once said, “an ounce of prevention is worth a pound of cure.” These two ideas help promote boater safety. Prior to a trip, the logistics can be overwhelming and scattered, or as straightforward as putting your kayak on the roof rack and driving to put-in. Regardless of the length of the trip or complexity of planning, taking the time to discus some details with participants is a crucial step prior to put-in. Here are a few things to discuss.

Who

  • Is going with you on this trip?
  • Is in charge of the trip?
  • Has paddled this run before? At this level? Or even paddled at all?
  • Has any training in swiftwater rescue or first aid?
  • Knows your plan, and where you are planning to boat?  Start?  Takeout?
  • Is going to send help if you don’t come back as planned?

What

  • Did you bring in the way of rescue equipment?
  • Did you bring in the way of first aid supplies?
  • Means of communication do you have in case of emergency?
  • Is the water level? The weather forecast?
  • Are the known hazards at this flow?
  • May have changed since the last time you ran this section?

Where

  • Is all the rescue and first aid gear located on the trip?
  • Are the eddys, and mandatory scouts to the rapids?
  • Is there cell phone service?
  • Is there access to road or trail?
  • Is there a landing zone for a helicopter

When taken into account and communicated with one another, the answers to these questions can identify safety concerns, or help streamline rescue efforts should problems arise. Remember its much easier to pre-plan and execute then to play catch-up when caught off guard. Get the gear, get the training and practice practice practice!

Wilderness First Aid: Improvised Splints

Splints: The good the bad and the ugly

Building a good splint takes time and thought. In our wilderness first aid courses  some students do lots of both and still the end result leaves something to be desired. This post discusses improvised splints and gives some tips to building your own. Over the last 6 years teaching Wilderness First Aid, I’ve seen it all. I have also made some useful splints in my 10 years guiding commercial wideness raft trips.

What makes a good splintIMG_6010

A good splint satisfies three main criteria:

  • It is comfortable. That is to say that it fits well, and feels good to the patient.
  • It is functional. A good splint should provide that stability and support, while immobilizing the affected area.
  • It should look good. Style points for splints that look good and stay looking good during an evacuation. this means that they don’t fall apart or come undone overtime.

Get wise and improvise

splint with pfd

knee splint with pfd

Improvisation is one of the key components to being good first responder in the wilderness setting. The bottom line is that we don’t have all the gear we wished that we did when a situation arises.  The ability to assess and address with what is available to you in the backcountry is a skill that can be taught, but is more likely honed over time spent in the field. “RGI” or River Guide Ingenuity  as  guides like to call it takes creativity and critical thinking. Find a way to make it work.

Here are a few improvised uses of common place items on a boating or backpacking trip for splinting.

  • Raincoat / jacket
  • Crazy creek chair
  • ski /trekking / tent  pole
  • lifejacket pfd
  • t-shirt / sweat shirt
  • paddle
  • Backpack / belt pack

Splint Style and Construction

leg splintsFrom a materials standpoint, a splint has three parts: padding, rigidity, and something to hold it together / cover it up. The classic “sandwich” style splint utilizes these three layers in the above mentioned order to immobilize an injured area.  The bigger the bone you are trying to immobilize the more holding power you’ll need. Security is a huge deal. Sure NRS straps work great because you can tension them and adjust them, but we don’t always have them, so be prepared to use string, rope, shoe laces t-shirt strips to secure the splints you build.

If a pad  thermal rest or  float bag is available you can try the “jelly roll’ splint. This style you roll up bulky padding and tension it (often with a rigid component inside) around the affected area.

Splint Tips: a few reminders.

  • Check circulation sensation and mobility before and after you build  splint. Continue to monitor CSMs.
  • Immobilize the bone above and below a joint injury and the joint above and below a bone injury.
  • For leg immobilization the rigid components should be as long as they can without interfering with walking. (for example: hip to toe on the outside)


New Instructors: The 2014 Rescue 3 Instructor Course

instructor course group

Group shot from the 2014 instructor course.

Recap of the 2014 Instructor Course

Another successful instructor course complete. This year’s course was located on the lower Stanislaus river in Knights Ferry, CA. Thanks to the fish, flows were bumped up to an impressive 1200 cfs. At that level the training site at Russian rapid really becomes ideal. It provides great locations for shallow water access and entrapments and lower down, facilities swimming and throwbagging.

The highlight is the 200′ tension diagonal through the middle of the rapid. The course involved 5 days of water-focused training to get these instructor candidates up to speed. This is what co-owner Julie Munger had to say about the 7 guys that just completed the instructor course:

2014 instructor course group photo. congrats!

2014 instructor course group photo. congrats!

“WOW! What GREAT Instructors! Dave and Jeff from Wet Planet, Bhupi from INDIA!, Chris and Justin from Brea and Fullerton Fire, James from Adventures Unlimited in Colorado, Jeremiah from ZODIAC, Britt from ROW in Northern Idaho. Don Lester and I had the pleasure of joining these amazing guys!”

instructor course boat on tether

Britt surfing the boat on tether.

These guys are to be commended; the instructor path is no easy task. The prerequisites are a hefty undertaking themselves and mastery of the skills taught in the SRT, SRT-A, WRT, RRC, and RRC-Pro is not light work. These guys proved their diligence and focus and combined to make an awesome course. Good luck out there gentlemen.

Rescue 3 International Instructor Trainer Meeting

RQ3 group, rescue 3 international, rescue,

the group after the competition.

Another successful Rescue 3 international IT meeting down. A few weeks ago, Rescue 3 instructors from the U.S. and abroad gathered at the Nantahala Outdoor Center for a week of classes, networking, and curriculum development. The folks at the NOC provided a great atmosphere for the meeting. It sure was fun and informative to have all that knowledge gathered in one place. This years conference had a rescue relay competition and team Sierra Rescue blew the competition out of the water. Participants had to move through a challenge course consisting of shallow water crossing, throwbagging, boat  flip management, and swimming.

Like the conferences of past years, several instructors  made presentations, and awards were given out by Rescue 3. Many participants  brought good information and questions to the table.  The collaboration of instructors from across the world led to a discussion as to the future of the world of rescue, and how Rescue 3 fits into that future.

Rescue Competition from the 2014 Rescue 3 international conference

Rescue Competition from the 2014 Rescue 3 international conference

Next year the conference will return to Northern California to the home turf of Rescue 3 and the regional training provider Rescue 3 West. Classes will be held up on the South fork of the American river and on Lake Folsom. A variety of courses will be offered ranging from Inland rescue swimmer to Techinical rope rescue. Aside from the courses, the team competitions will be a highlight. At Seirra rescue, we’re hoping to step up the level of competition for the 2015 ‘rescue olympics.’

See ya there!